Secure Check Printing Logo
Home
• Software Features• View Demo
Pricing
• Blog• Comparisons• Guides / Tutorials
• FAQ• Contact Us
About
DemoMy account
Secure Check Printing Logo

Improve efficiency, provide a better Customer experience with modern Technolo services available.

Secure Check Printing Logo
Home
Secure Check Printing Logo
Features
Secure Check Printing Logo
Pricing
Secure Check Printing Logo
Faqs
Secure Check Printing Logo
About
Secure Check Printing Logo
View Demo
Secure Check Printing Logo
Blog
Secure Check Printing Logo
Comparisons
Secure Check Printing Logo
Guides / Tutorials
Secure Check Printing Logo
Contact
support@securecheckprinting.org
+1 (682) 458-1476
Secure Check Printing Logo
Terms & Conditions
Secure Check Printing Logo
Privacy Policy

© Copyright Secure Check Printing . All Rights Reserved

Guide/TutorialsGuide/Tutorials

HomeGuide/Tutorials
• Getting Started• Installation & Setup• Registering Your License• Starting the 10-Day Trial• Adding Corporations• Adding Bank Accounts• Creating Payees• Printing Checks• Printing Deposit Slips• Password Recovery & Security Questions• Profile & Backup Options• Migrating or Restoring Data• License & Activation Management• Deactivating the Software

👥 Creating  Payees

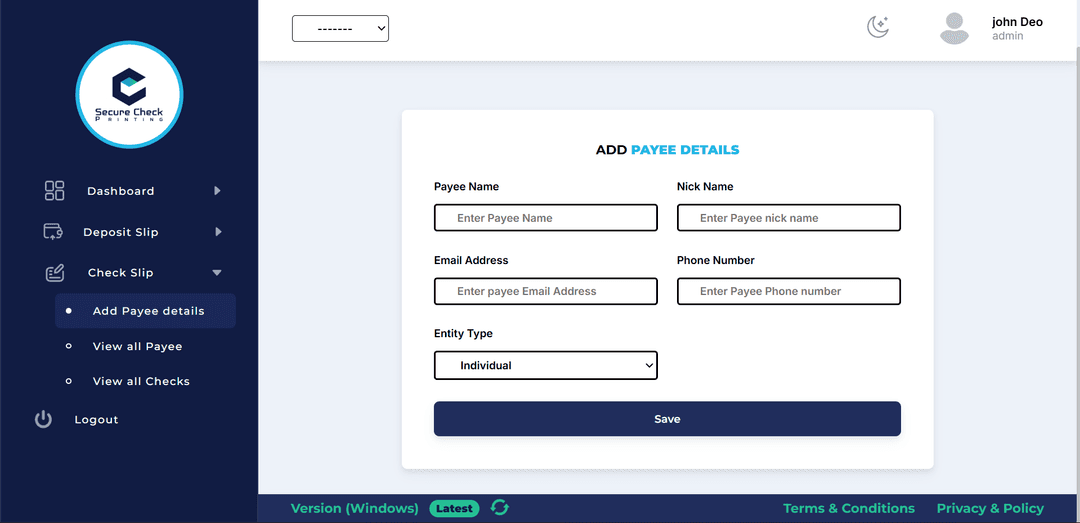
Before you can create your first check, you’ll need to add payees — the individuals or companies you issue checks to. Once a payee is added, their information can be reused anytime when writing new checks.

Why Add Payees?

Every check must be tied to a valid payee. Adding them beforehand helps you organize payments, filter records easily, and prevent mistakes while creating checks.

How to Create a Payee

  • 01
    Navigate to the Payees section from the sidebar.
  • 02
    Click Add Payee details.
  • 03
    Fill in the required details:
    • •   Name (Full payee name)
    • •   Nickname (for easier reference)
    • •   Email (optional but useful for recordkeeping)
    • •   Contact Number
    • •    Entity Type:
      • •   Individual
      • •   Company
      • •   Reseller
      • •   Expense
  • 04
    Depending on your selection, you’ll see extra fields — for example:
    • •   Company Name (for company)
    • •   Reseller Name (for reseller)
    • •   Expense Title (for expense)
  • 05
    Click Save Payee to store it.
add payee page

Organized & Ready

Once added, Your saved payees will appear in a clean list with quick search and filter options. Whenever you create a new check, simply select the payee instead of typing everything again — easy, fast, and accurate.
And now that your payees are ready, you can move on to the fun part — creating checks that automatically pull their details